Confirmation Of Asset Details
📍 Previous Steps
Before this step, you should have:
Created a rental request which has been sent to one or more rental providers.
Accepted at least one quotation from a Rental Provider
When a rental provider has returned the details of the asset for your rental, you will receive an email to notify you similar to the following.
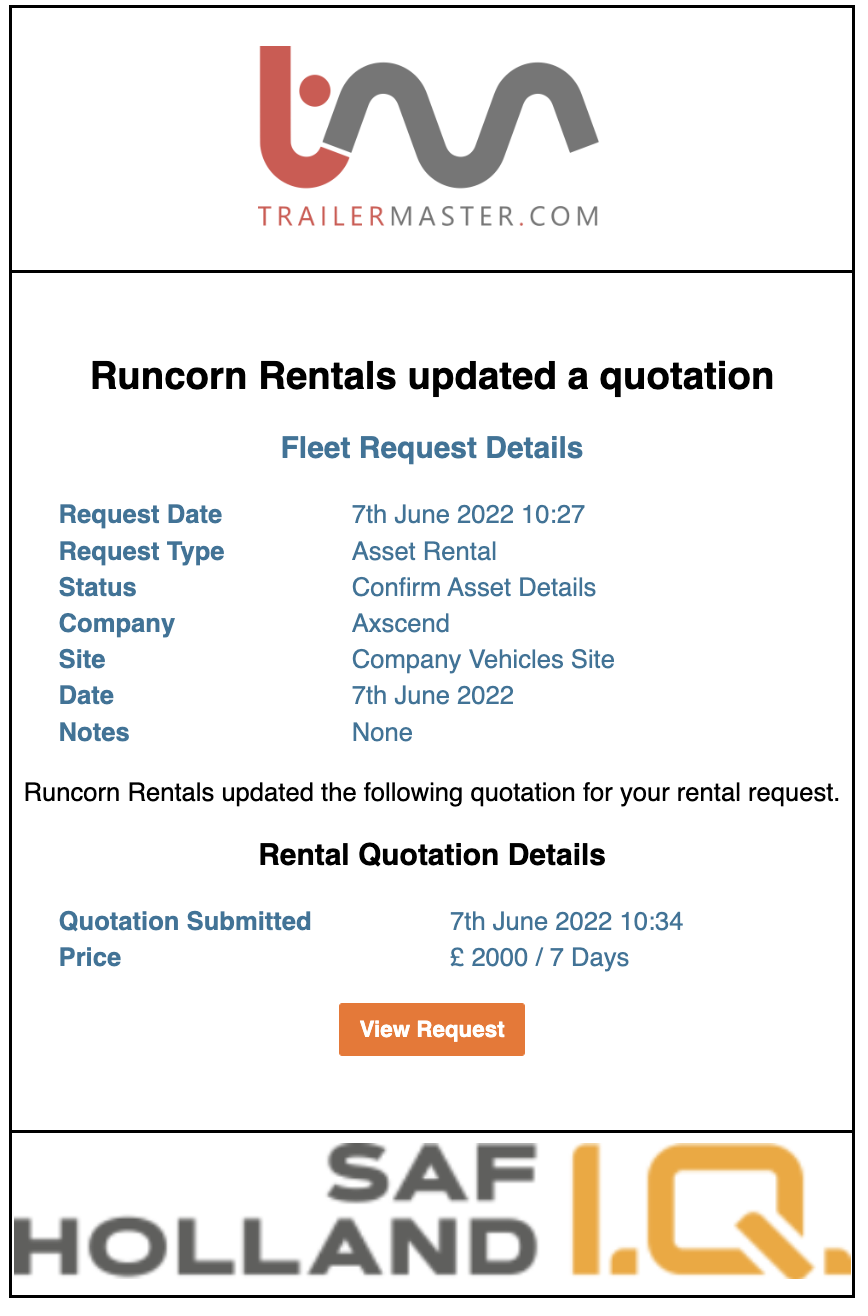 |
You can click on the ‘View Request’ button on the email to take you directly to the Portal request page. |
Viewing Asset Details
On the Fleet Desk page you can view the full details of the vehicle and action an Asset Creation Request based on the information supplied. Start by navigating to your open Rental Request using the left sidebar.

Click on the ‘Rental Specification’ tab

Scroll down until you see the accepted quotations, you will see an ‘Asset Specifications’ section. Click on the heading to expand the section.
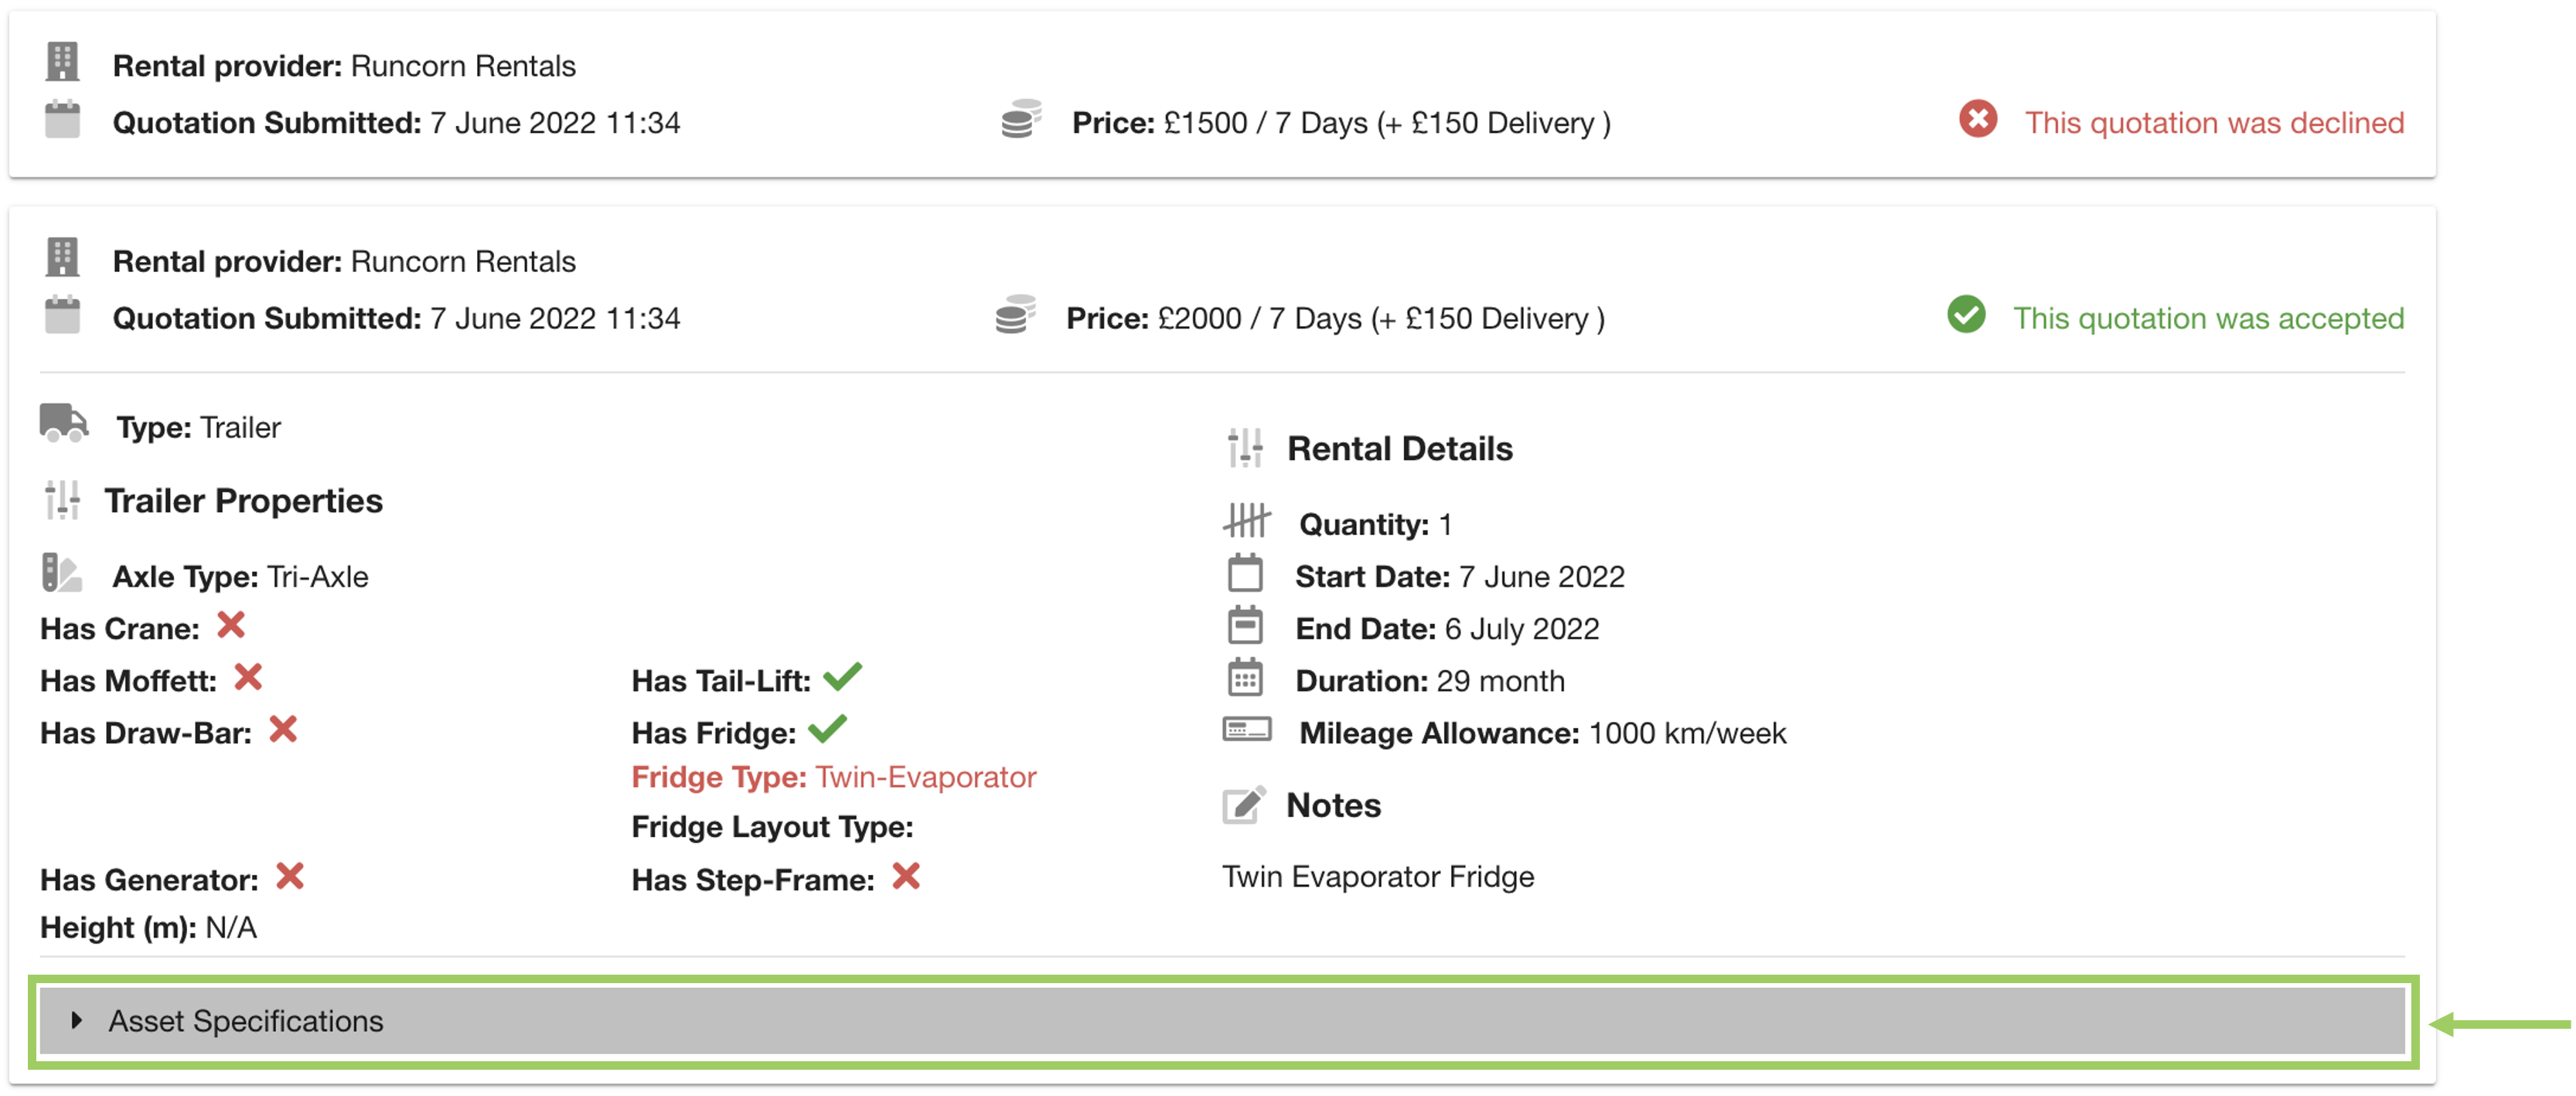
In the Asset Specifications section, if all the required details were filled by the rental provider you will now see a ‘Make Asset Creation Request’ button. Click this to start the Asset Creation process.
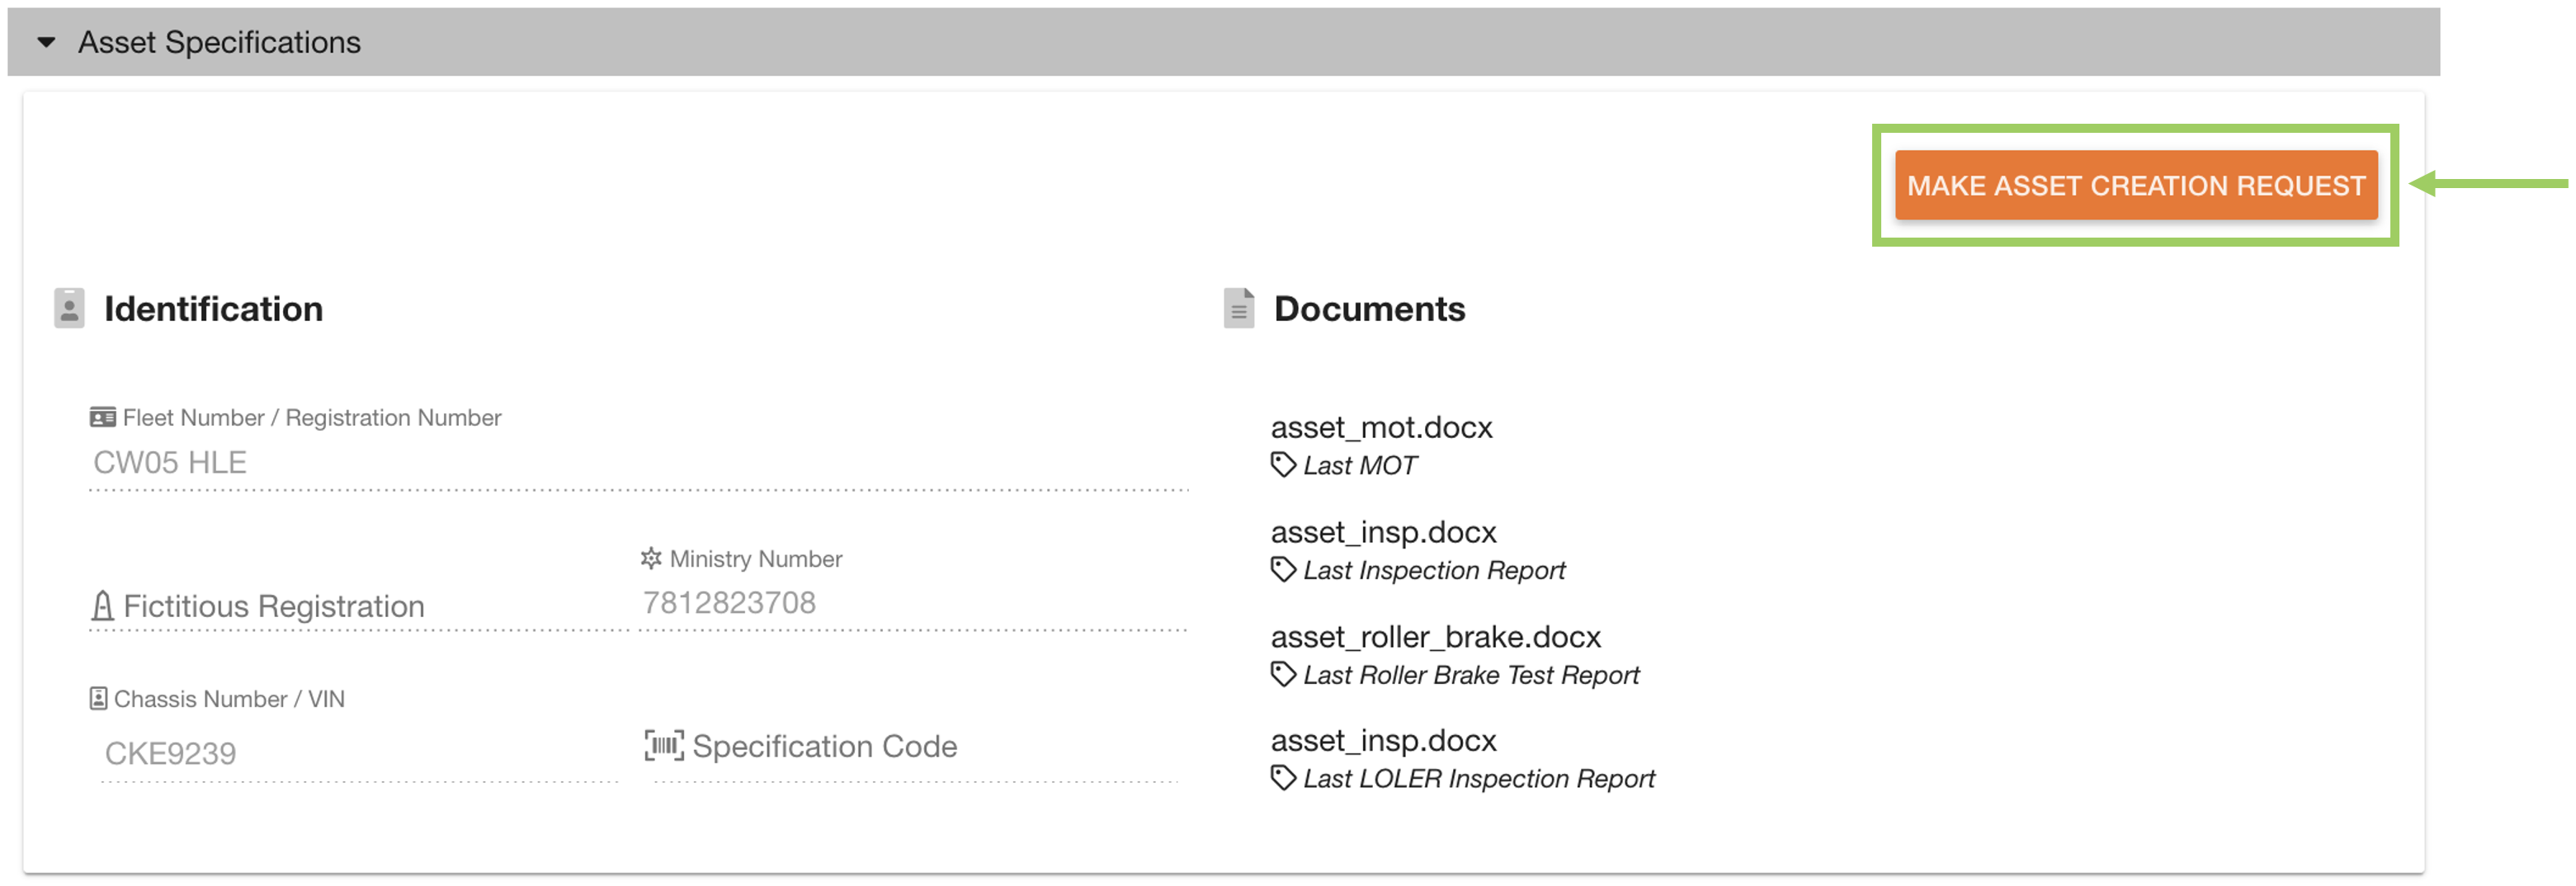
This will create a Fleet Desk request to create the Asset on the Portal. However, you will need to supply more information on the Creation Request before submitting.
Now, the button should show ‘Go To Fleet Request’.

Asset Creation Request
Click the ‘Go To Fleet Request’ button to open the request.
Before the Asset Creation request can be submitted, there may be more details required.
Asset Details
Click on the ‘Asset’ tab to start filling in the information required.

On the Asset tab you will see a ‘Missing Fields’ section, which tells you which fields are required for the request.
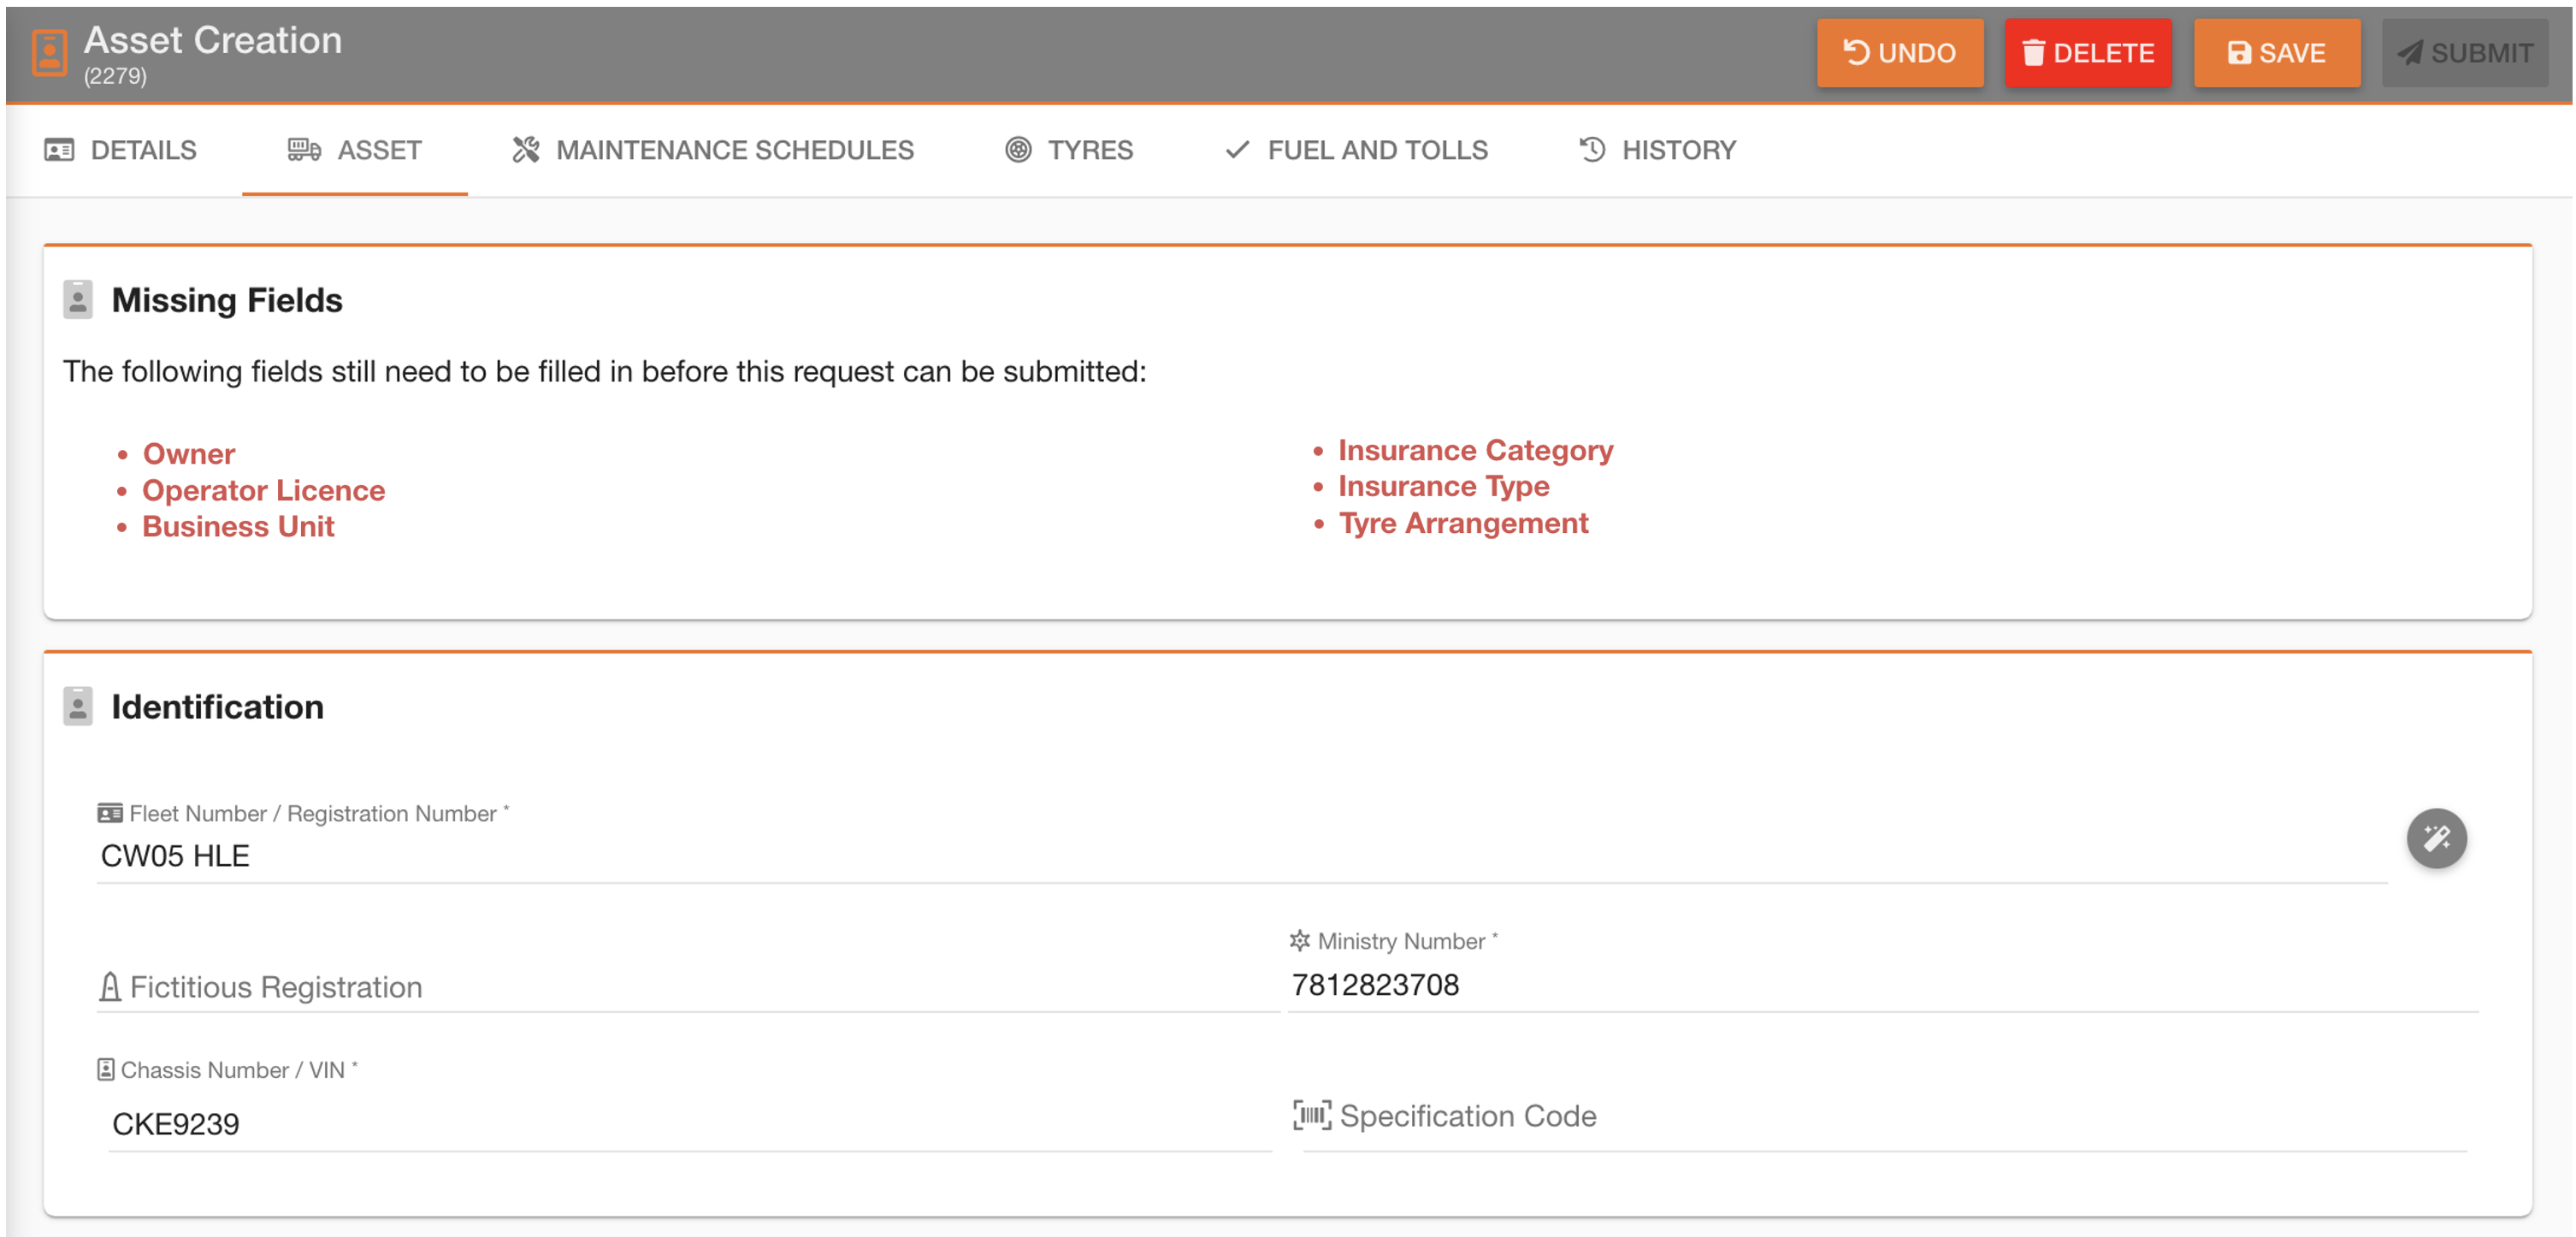
When all required fields have been filled (the missing fields section) should disappear. Next click on ‘Maintenance Schedules’ on the tab bar to move on.

Maintenance Schedules
On the Maintenance Schedules page, you will again see a summary of the missing documents/scheduled which will need to be provided before the asset is created.

To add a maintenance schedule to the asset, click the ‘Add A New Maintenance Schedule’ button. Each missing schedule will need a new maintenance schedule creating.
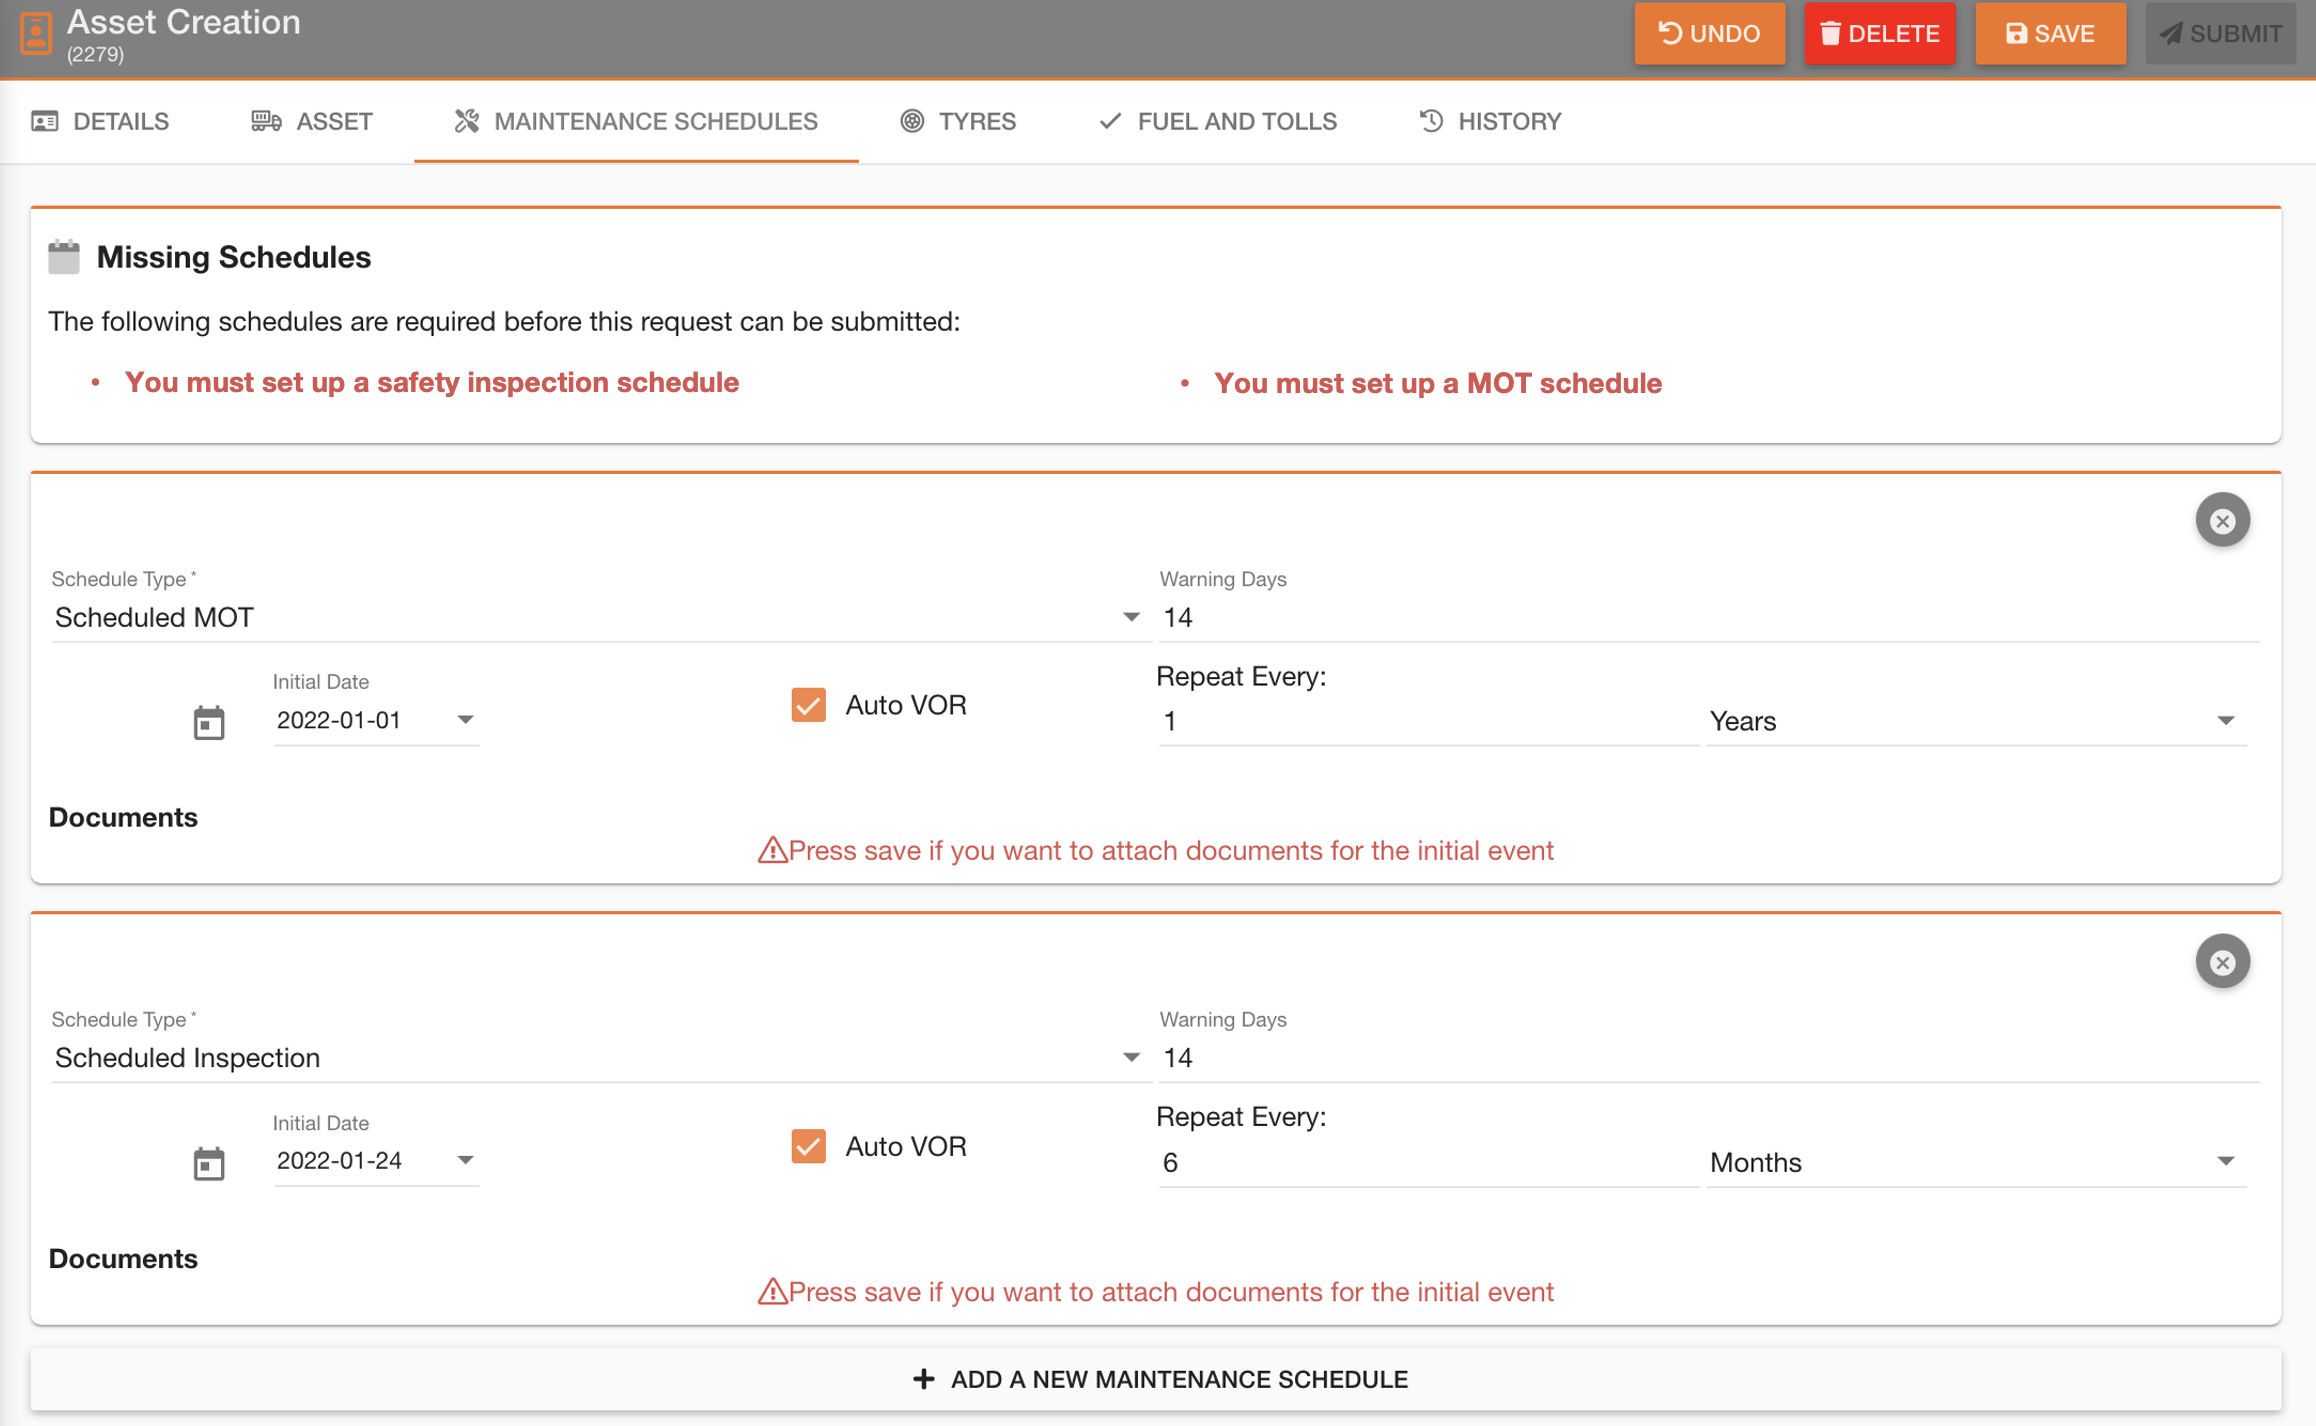
Once details have been filled, click the ‘Save’ button to save your progress. This needs to be done before the required documentation can be attached.

Once saved, you can now upload the relevant required documents alongside the maintenance schedules.
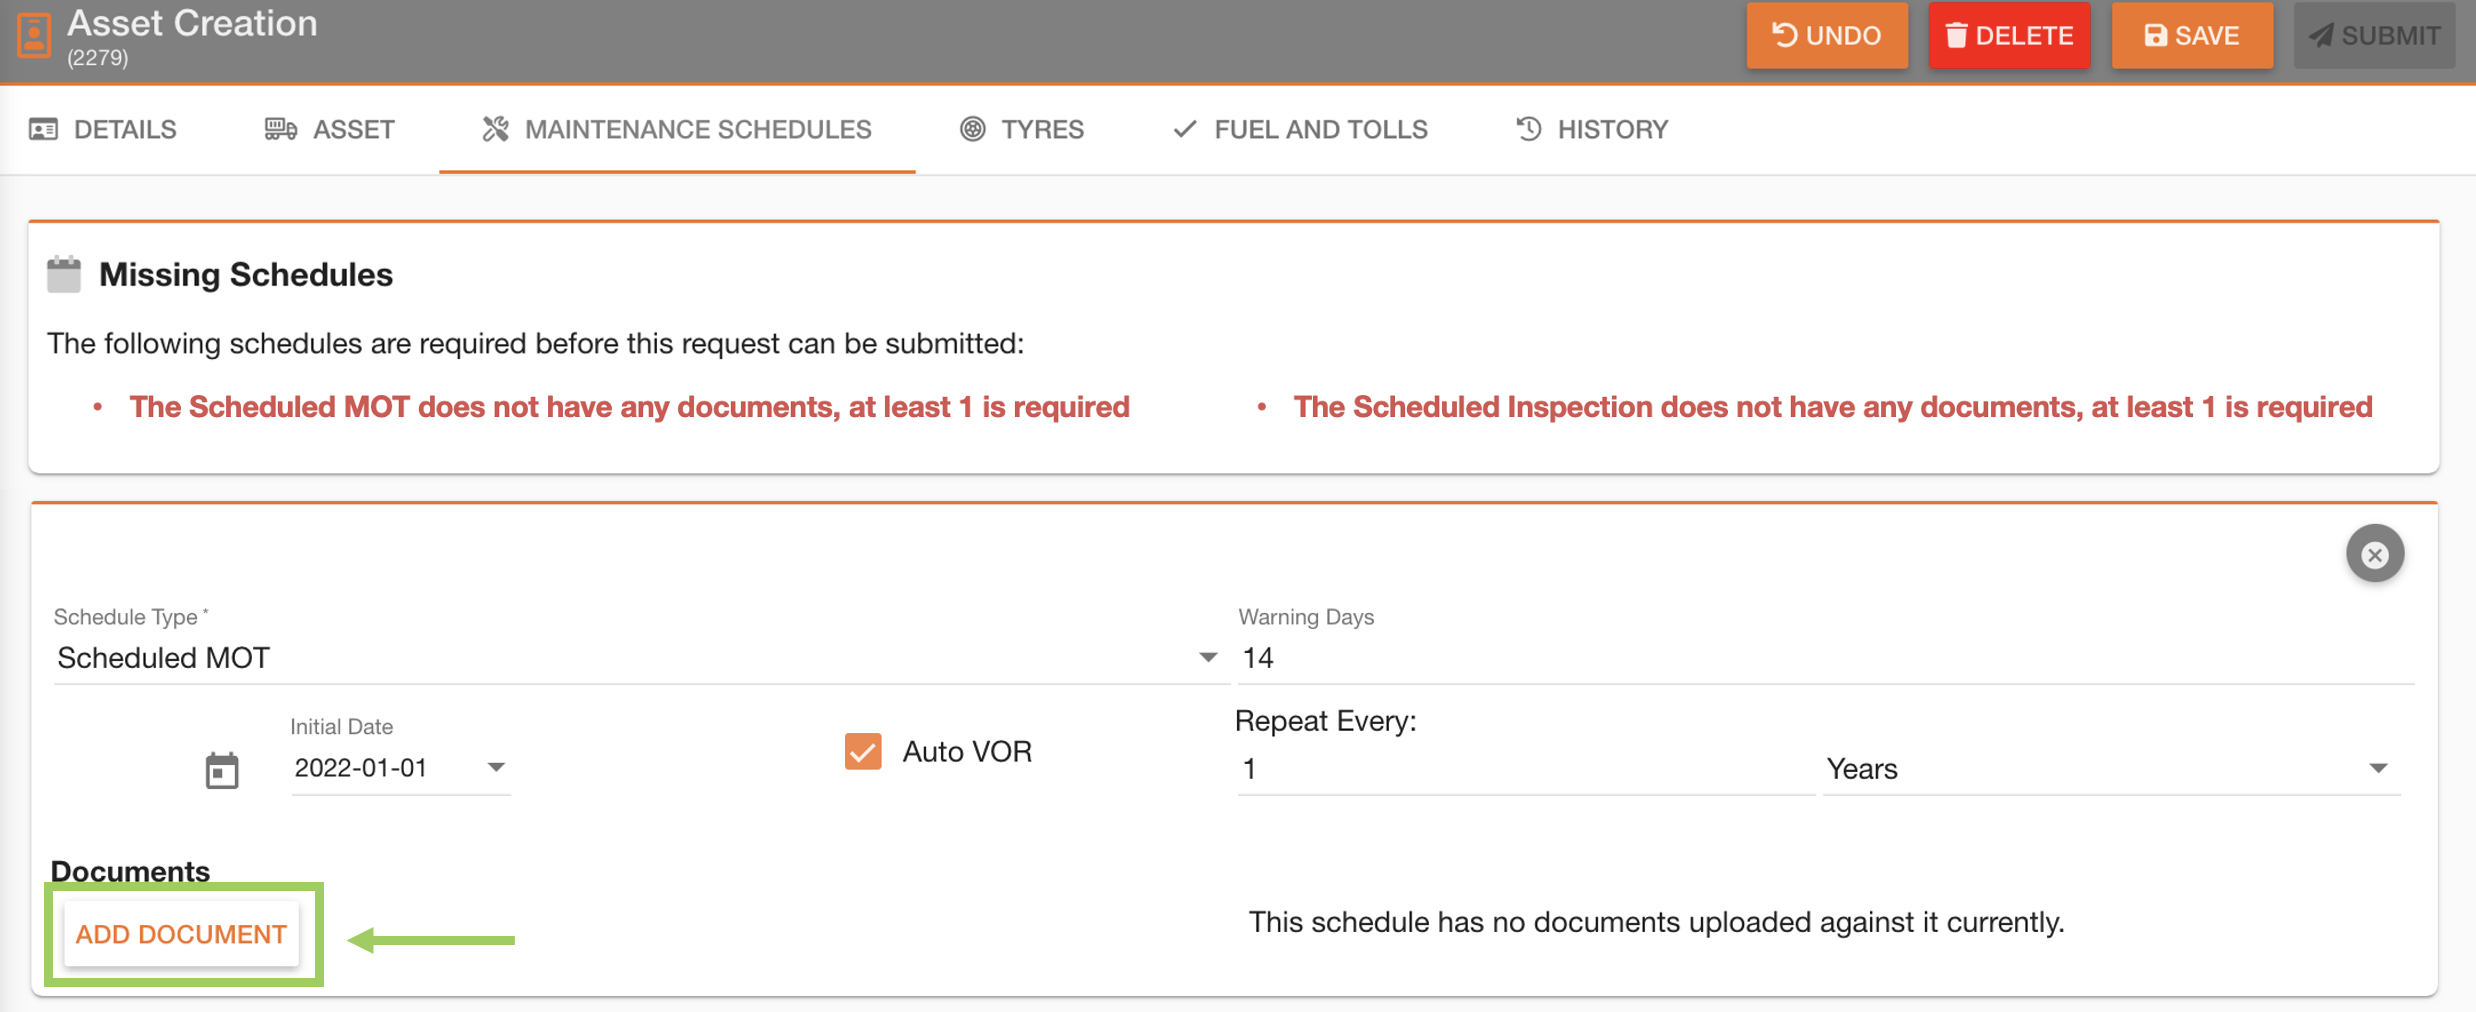
This will open your computer folders. From here, select a file to upload.
Once you have selected your file, you should see your uploaded file alongside the maintenance schedule.

Repeat these steps to upload documents for each maintenance schedule. Once all schedules and documents have been uploaded, the ‘Submit’ button will become active.

As per usual Asset Creation requests, this will send the Fleet Desk request to create the Asset on the Portal. Until approved, the asset will not appear on the portal.
📍 Next Steps
Your side of the rental process on the portal is now complete. Once the Asset Creation request has been approved, the vehicle will be modelled by an Asset on the Portal.
The rental provider will deal with the delivery of your leased vehicle(s)
 Troubleshooting
For any issues or errors that have not been solved please Contact Axscend Support.
.png)

